Simple Recipes For The New Homemaker
Hi, friend! I wish I had a guide like this when I became a homemaker four years ago. Even still, I am constantly learning, so even if you are a seasoned homemaker, I hope that you can learn something that I share here today. Either way, let us gather here together and practice the beauty of learning and remembering. I am so glad to walk with you in creating a fruitful home, and I am so proud of you for stepping into this calling!
Welcome to Mama’s Fruitful Home! My YouTube channel and blog is inspired from Titus 2:3-5 and Psalms 128:3. Titus 2:3-5 says, “Older women are to be reverent in behavior, not slanderers, not slaves to excessive drinking. They are to teach what is Good, so that they may encourage the young women to love their husbands and to love their children, to be self-controlled, pure, homemakers, kind and in submission to their husbands, so that God’s Word will not be slandered.” Psalms 128:3 says, “Your wife will be like a fruitful vine within your home, your children, like young olive trees around your table.” My hope and prayer here is to grow in sweet sisterhood, that we may flourish together in Christ-likeness as daughters of The King, always encouraging with Scripture. I will share tips on homemaking, ways to care for our over-all health in our God-given design and cooking and baking from scratch. Whether you are a brand new homemaker, or you’ve been homemaking for years, my hope and prayer is that God may use me to encourage you in your journey of creating a fruitful home. I am so blessed to have you here!
We all have sensitivities to the un-natural process of foods, and the lack of eating whole foods. Making our own food from scratch is a blessing for our family’s health.
Let’s get cookin’!
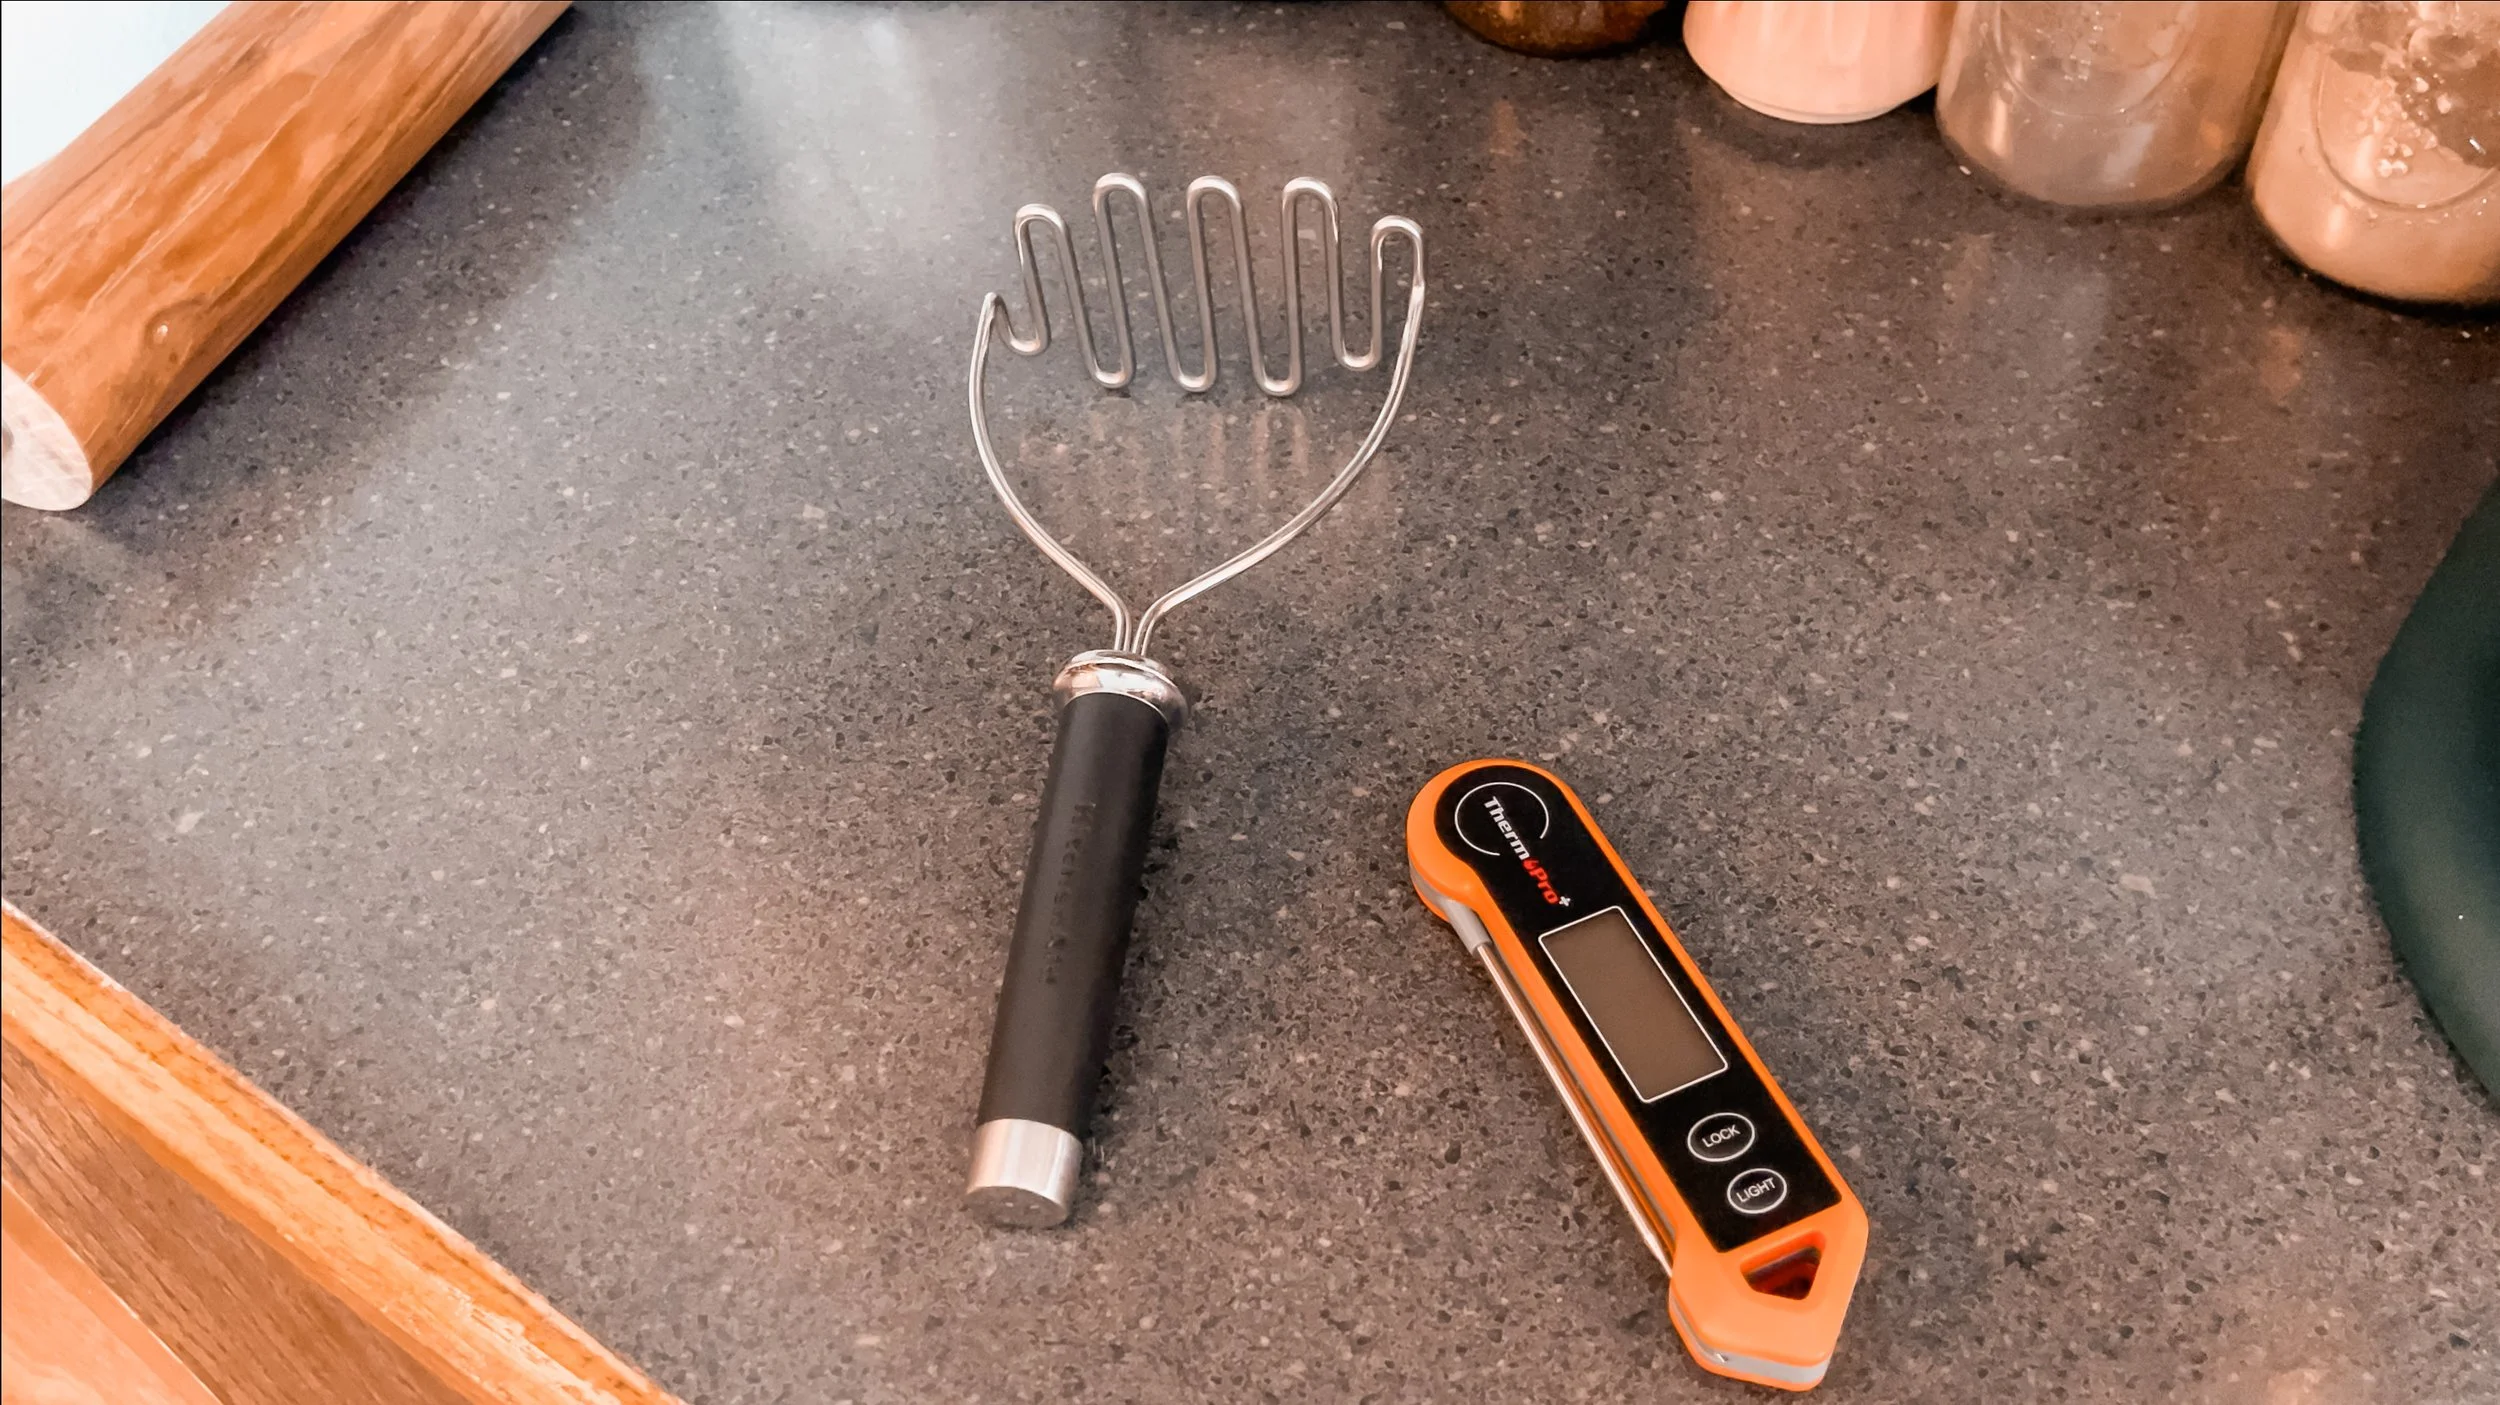
My first two recommendations if you are a new homemaker- a meat thermometer and a mashed potato masher! We will be using both today.
Today, we are making brown sugar for coffee syrup and barbecue sauce, sour cream dip, three chicken meals and one ground beef meal!
Brown Sugar For Multiple Purposes
Coffee Syrup & BBQ Sauce
First thing’s first. Learning to make something that you can use for many different purposes. Let’s start with brown sugar!

For one batch, which is one cup worth, of dark brown sugar, you’ll need one cup of sugar and two tablespoons of molasses. If you prefer the taste of light brown sugar, do one tablespoon of molasses- you’ll see me do two here, because anything molasses is an obsession of mine! Mix that all together and get as many of the clumps out. Done!
Now, with this beautiful brown sugar we just made, let’s make some coffee syrup, because we all need a cup when we start learning something new!
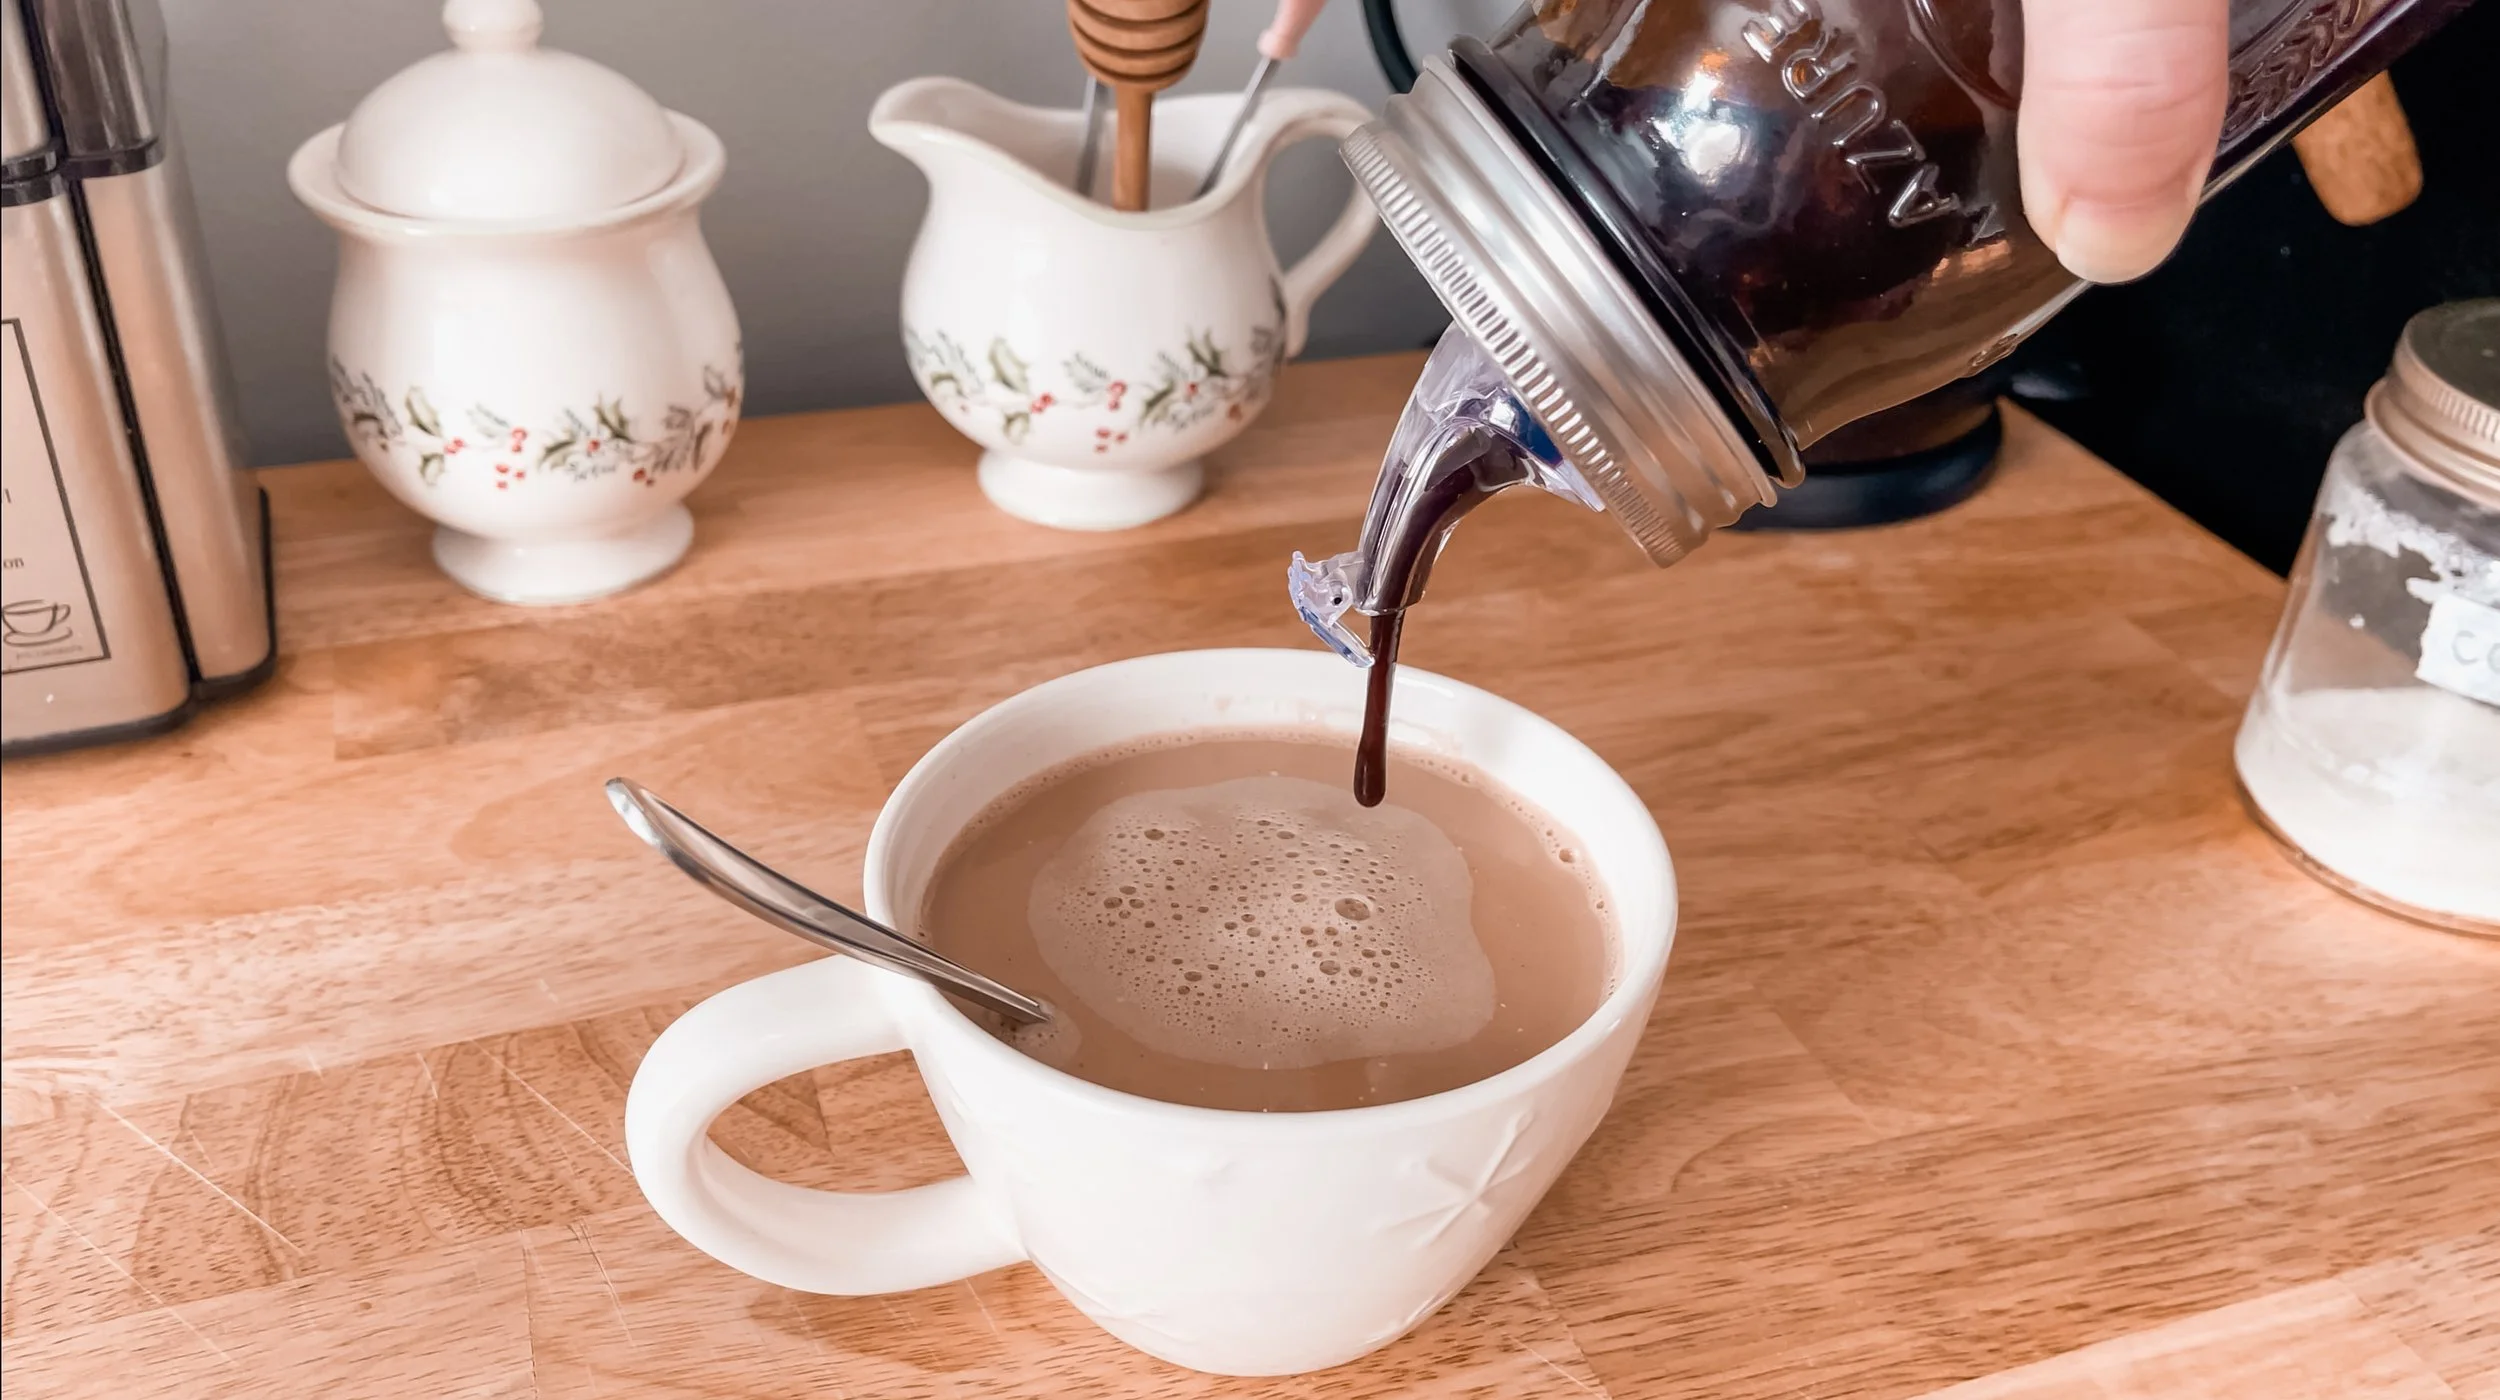
Brown sugar coffee syrup is my absolute favorite to make and enjoy with my cuppa Jo. I’m also obsessed with anything cinnamon, plus it’s a great anti-inflammatory and antimicrobial, which is great for these Winter months! This coffee syrup recipe is Cinnamon Brown Sugar. The reason I make us our own coffee syrup is because the coffee syrups you’d find at coffee shops and creamers you’d find at the store are full of yuckies such as high-fructose corn syrup, artificial sweeteners and gums. To make one cup of this coffee syrup, you’ll add one cup of our homemade brown sugar and one cup of water, preferably filtered- we use a Berkey, to a small pot over low-medium heat on the stove-top, until the brown sugar is dissolved. Basically what we’re doing here is frequently stirring until we can feel no more grains with whatever we’re stirring with. Once it’s all incorporated, add one-and-a-half teaspoon of cinnamon, and then put the flame a bit lower, to let simmer anywhere from ten to fifteen minutes. I prefer thicker syrups, so I did it for fifteen minutes. However, next time, I’ll make sure to do ten minutes, because by the time it set in the fridge until morning, it was so thick that it didn’t come out of the pour spout on my jar. Haha. I’m simply using a spoon to get it out, which is totally fine. Remove the pot from heat, and add in one teaspoon of vanilla extract. Pour into heat-safe cute jar, and let cool completely before putting a lid on. Once lidded, either keep on the countertop for a couple of weeks, or in the fridge for about a month. Simple & delish!
Now onto barbecue sauce!
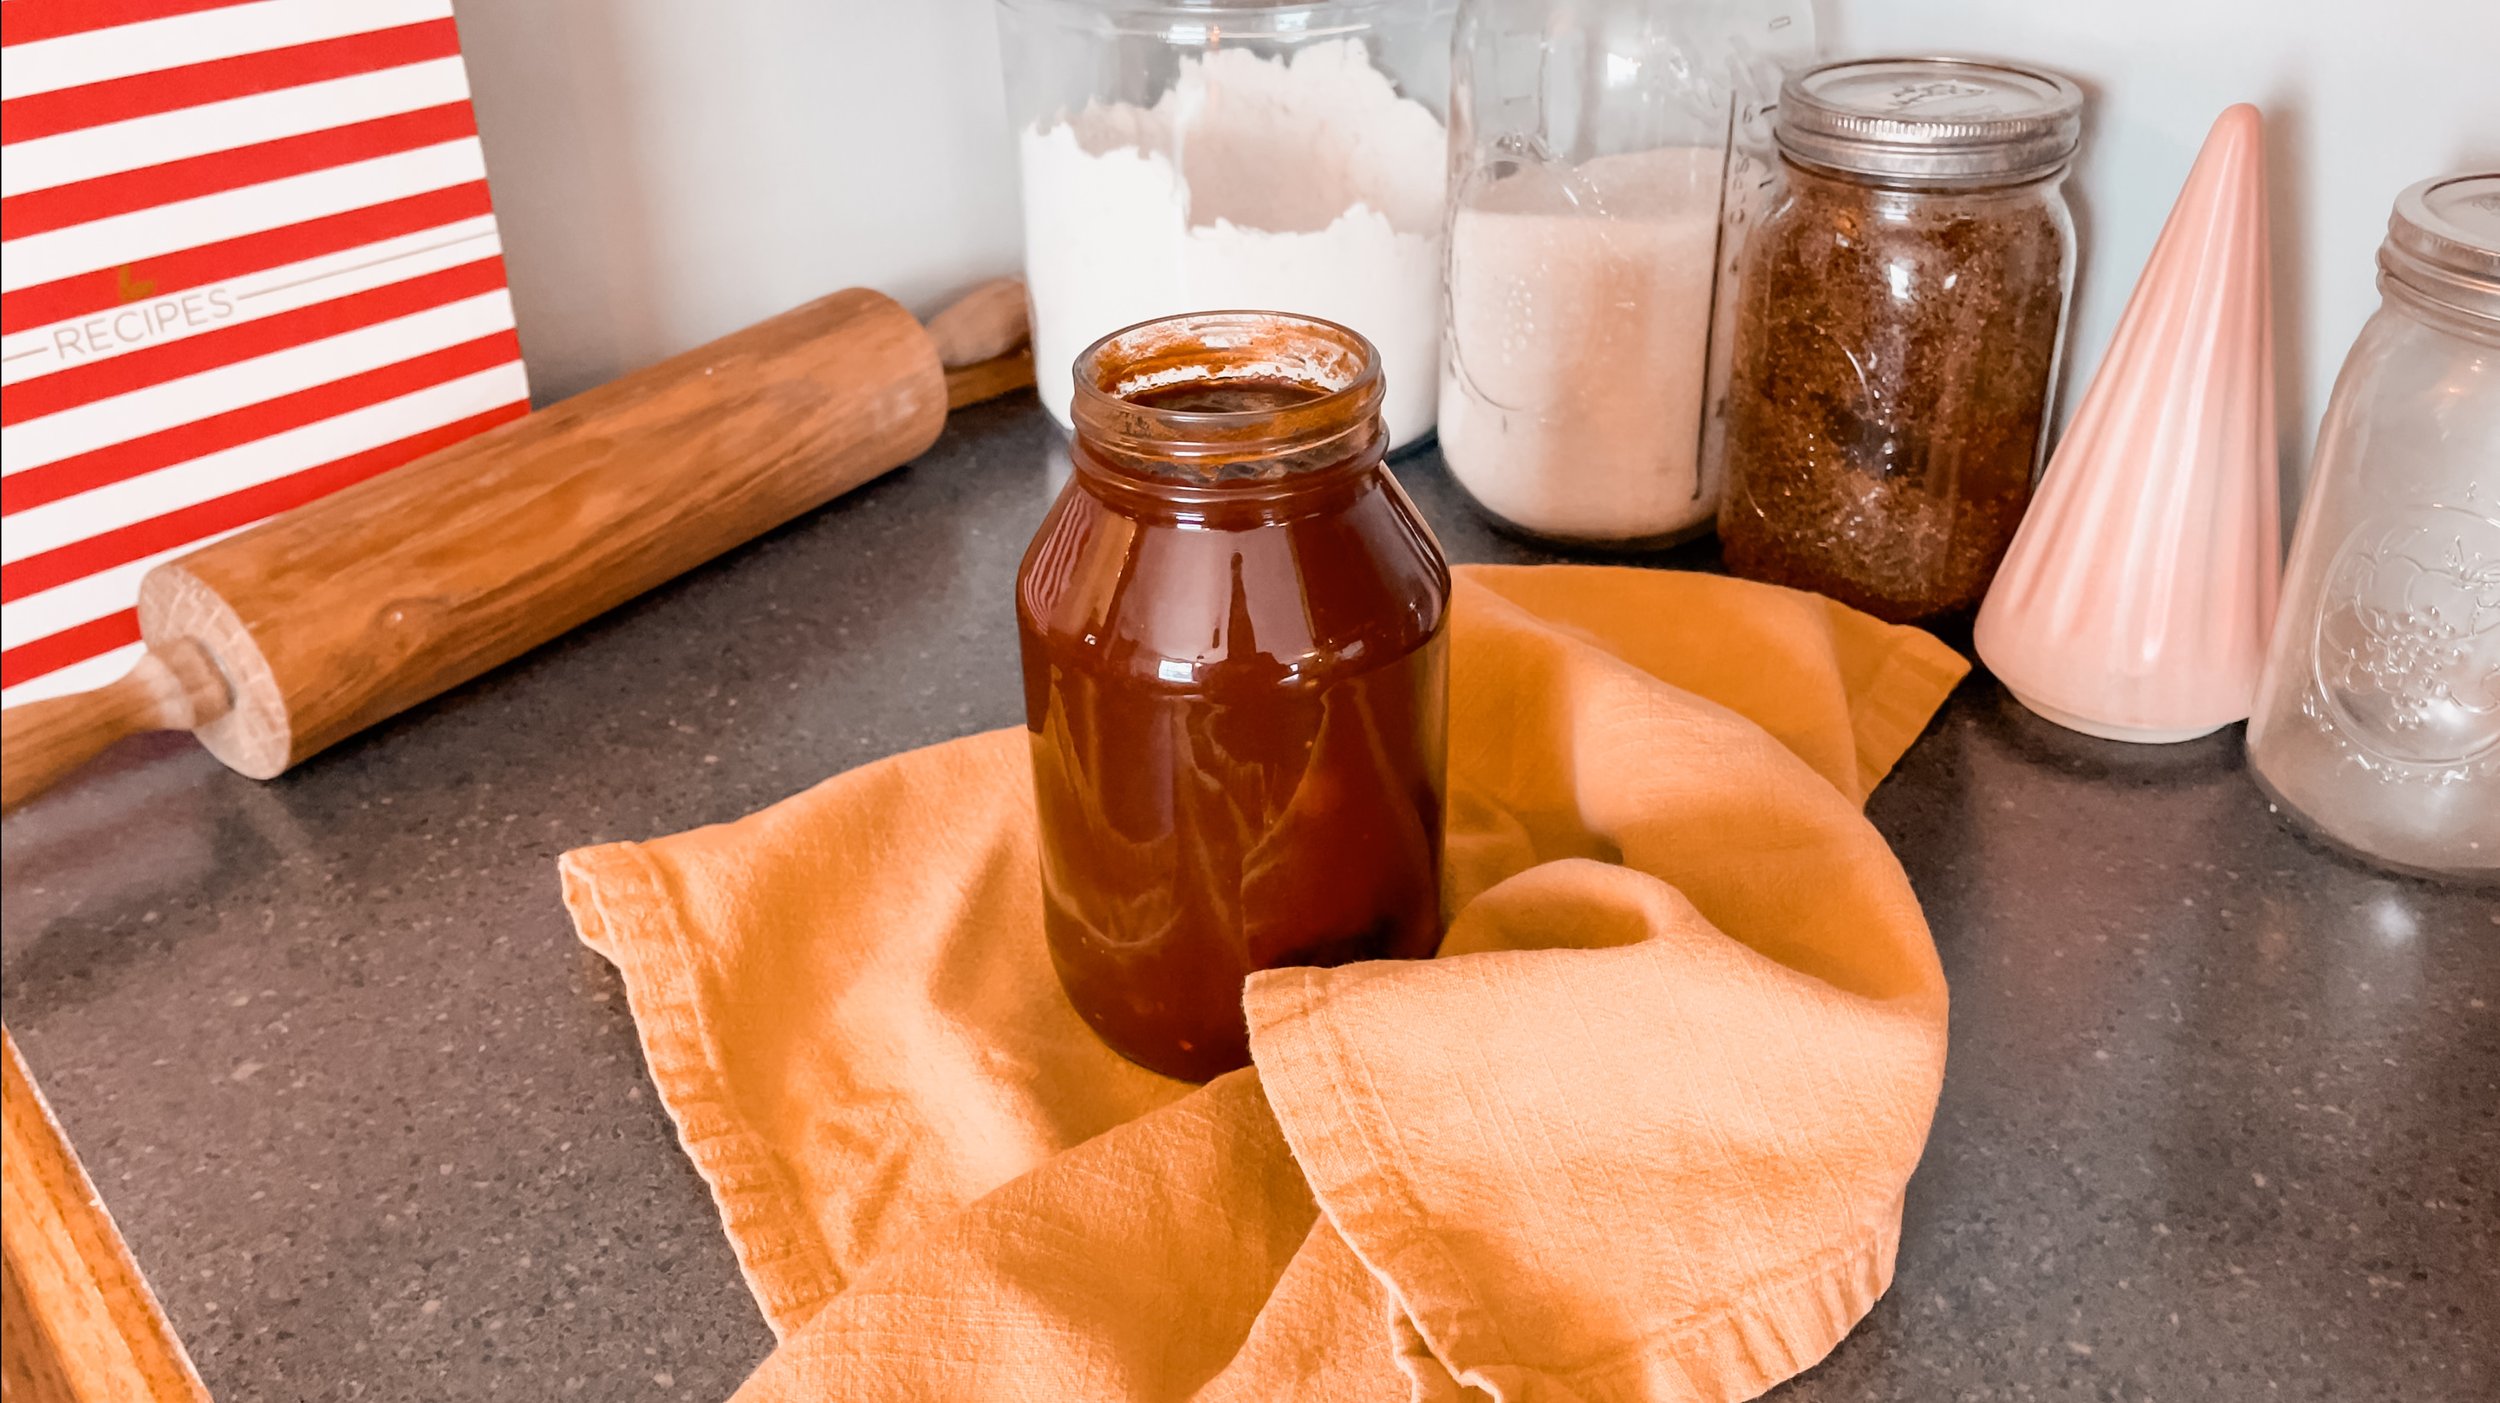
Some of the reasons we prefer to make our own barbecue sauce is 1) because of the nasty added ingredients such as high-fructose corn syrup and “natural flavors” in store-bought barbecue sauce, and 2) because we have all of the ingredients right here in our home and can make it cheaper than it sells for at the store. For one batch, which is four cups worth, you’ll put all of these ingredients in a small pot : three-and-a-half cups of tomato sauce- you’ll see me use strained tomatoes here, but really any tomato or pasta sauce will work!, one cup of our homemade brown sugar, half-a-cup of molasses, three tablespoons of worcesterschire sauce- you’ll notice I didn’t add this because I didn't have any on-hand, two tablespoons each of chili, garlic, and onion powder and ground mustard, one teaspoon of red pepper flakes- you can leave this out if you don’t like strong or a tad spicy things, and half-a-teaspoon of pepper. Put pot over medium flame until it starts to gently boil. Once boiling, lower flame, and let simmer for about five minutes. Pour in heat-safe cute jar, and let completely cool, before then adding a lid and shoving in the fridge- I don’t think this necessarily needs refrigerated, since there’s no dairy in it, however, I always do, simply because we’re used to all of our condiments being in the fridge.
There ya have it! THREE simple recipes that you can use for many different kitchen staples!
Sour cream dip
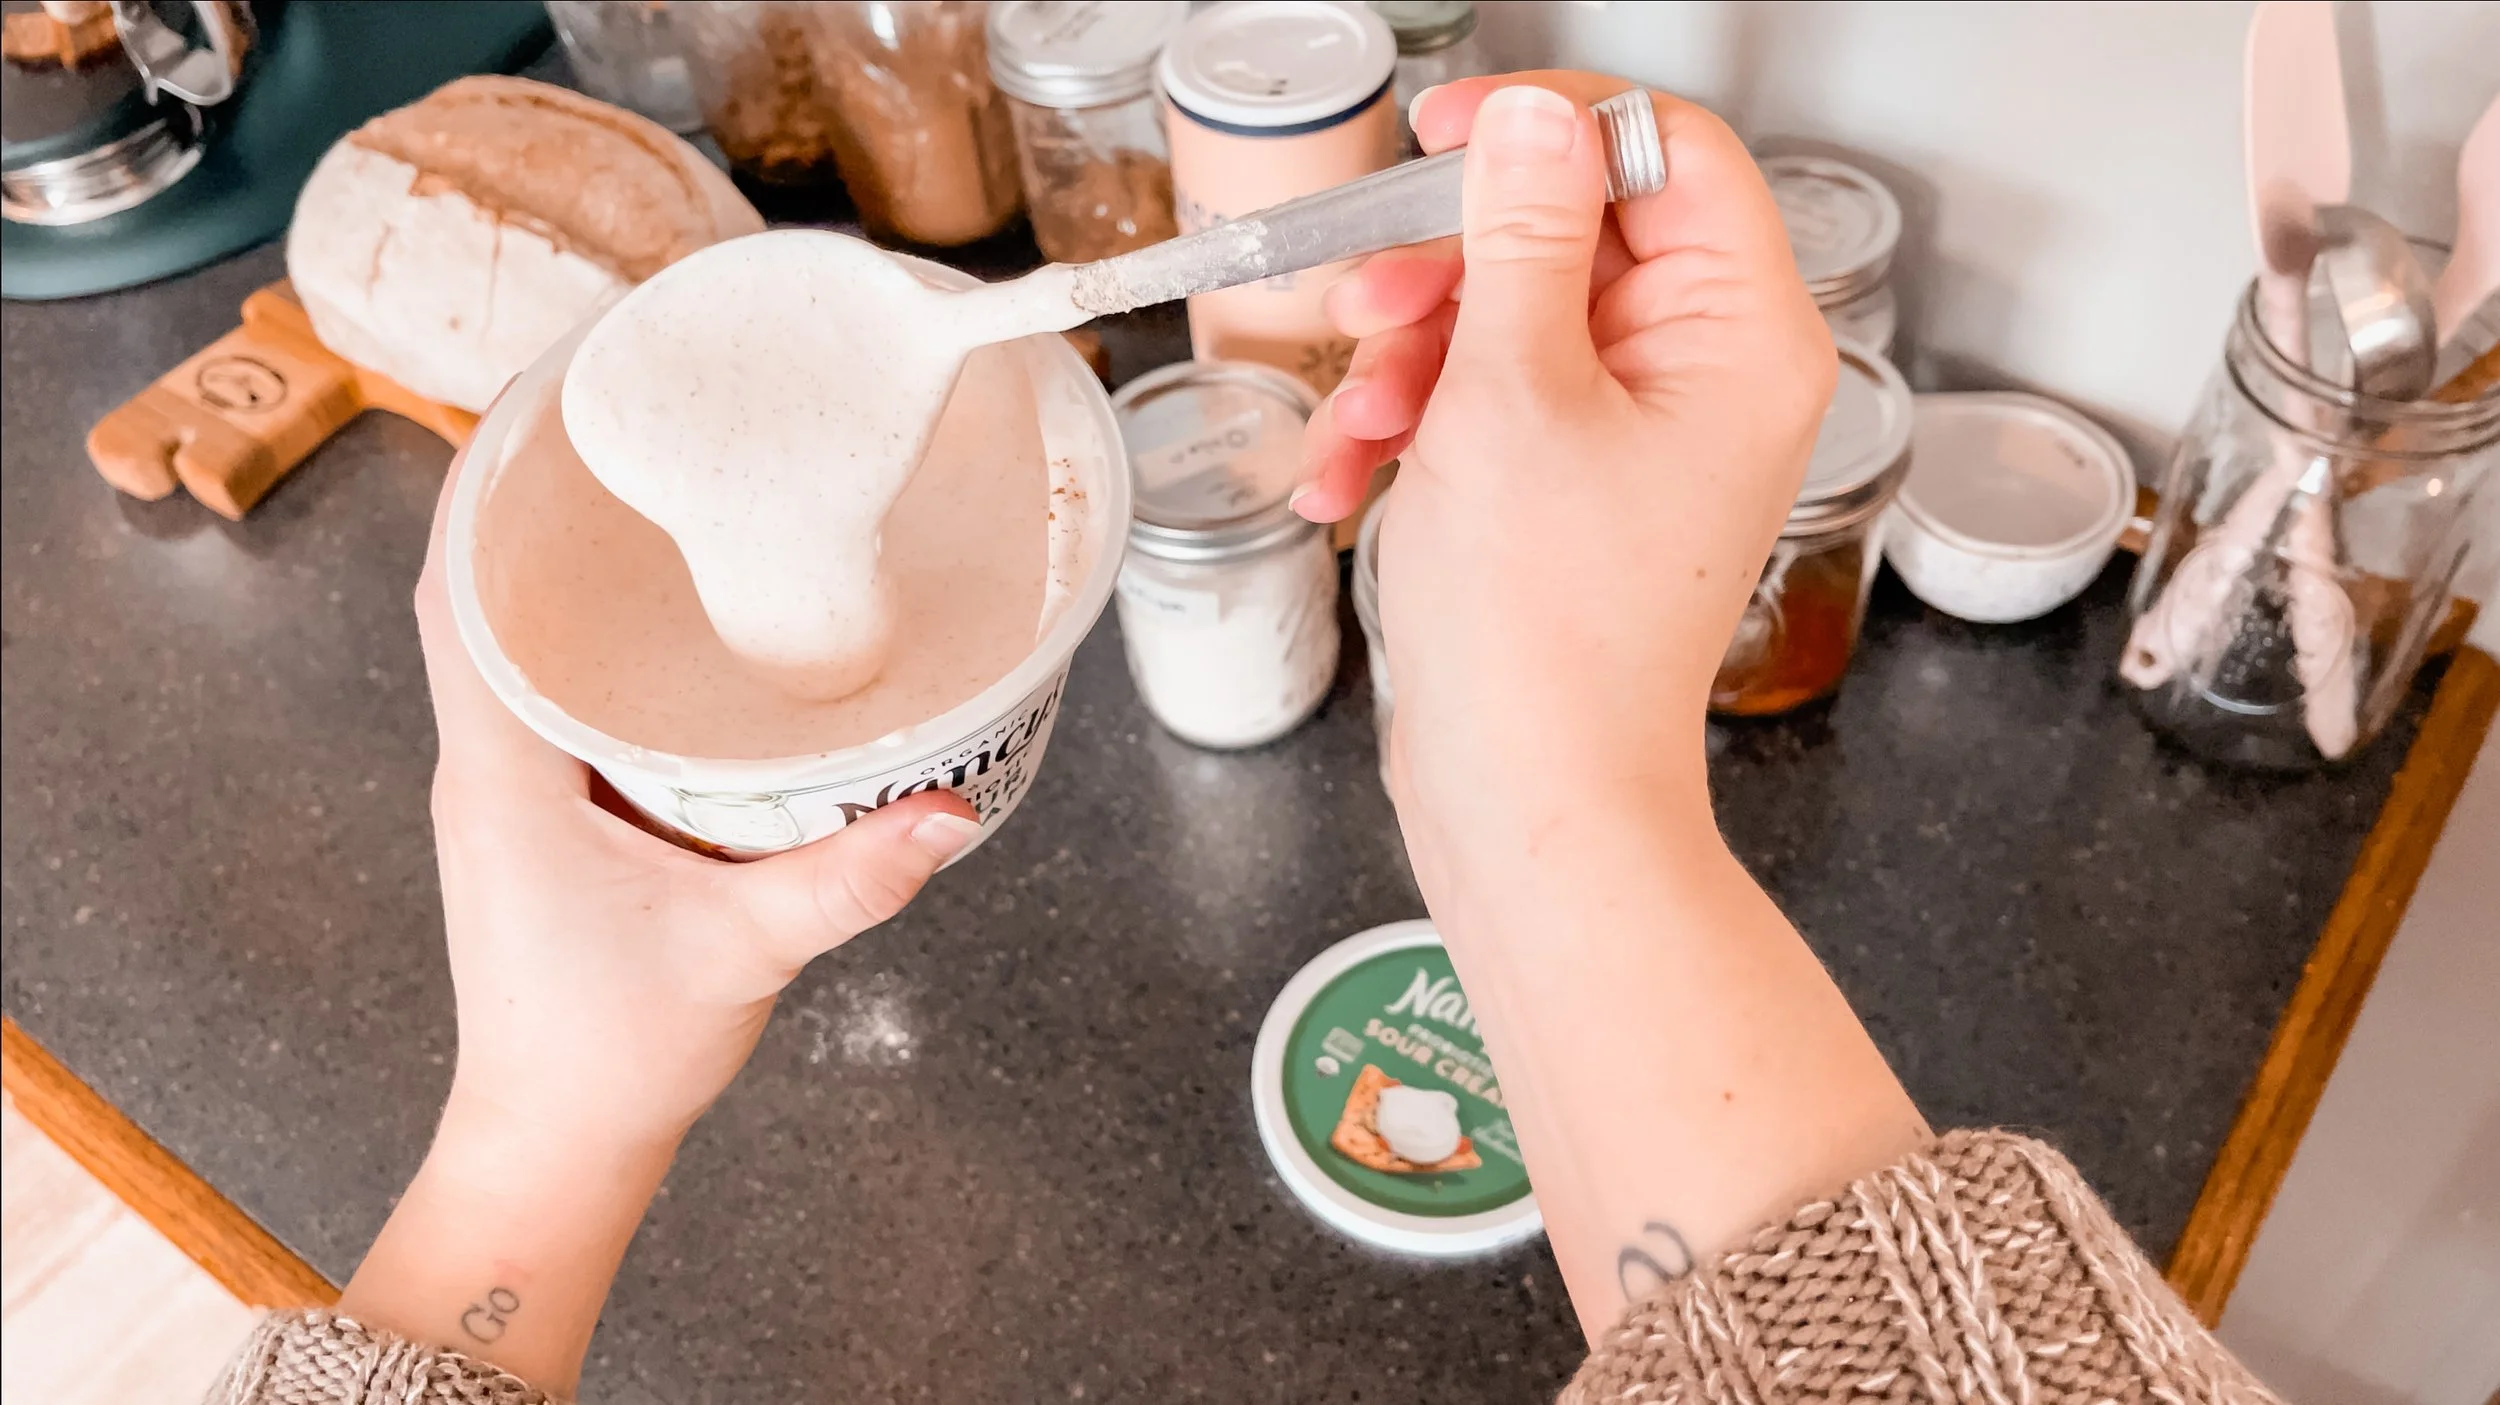
Before we get into the meals, I have one more condiment recipe, since everyone loves a good sauce! I mean, everyone loves a good sauce without preservatives and highly processed fats and oils. Plus, the main reason people like to go out to eat is because of the bajillion different sauces they can choose from. Sauces truly do make a meal so different! Our family has been able to get LOTS of chicken wings on sale at our local farms, and we had to get creative with how to enjoy so much of them! We always stock up on a ton of sour cream each month from Azure Standard, and we decided to make a sour cream dip that goes well with chicken wings and even as a taco and taco-bowl sauce! Since I live in my own home now, I can use an entire tub of sour cream for this without anyone yelling at me. Isn’t it lovely being homemakers?! I literally don’t have exact measurements for seasonings, so I’m leaving the real-time footage of me adding all of the seasonings to all of the things in today’s guide. What I add in this dip is literally what I use to also season everything in our home, so keep that in mind. We love to add salt, pepper and onion, garlic and chili powder to our sour cream, and mix until there’s no more chunks! Easy peasy!
Bone broth
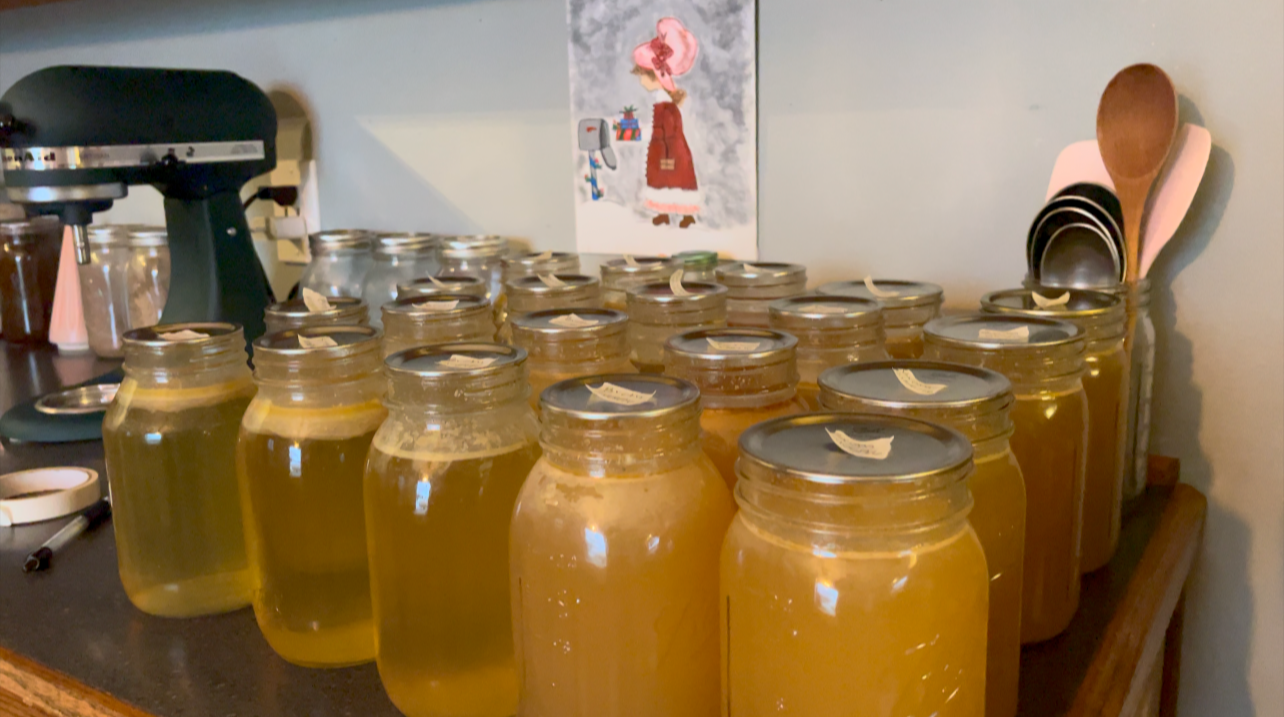
You’ll notice when we get to the meals, that I make our noodles and mashed potatoes in our homemade canned chicken bone broth. This is genuinely one of the easiest things you can do, and it was also one of the first things we learned to do when we got married. You don’t need to pressure can just yet if that’s intimidating- the process is still the same up until that point. The reason we make our own bone broth is because store-bought broths often have stabilizers, synthetic additives and heavy metals. We get chicken backs, and sometimes chicken feet, from our local farms. However, you don’t even have to go to that extent. You can simply eat some bone-in chicken, save your bones in the freezer, then add to a large pot of water when you’re ready to make it- again, preferably filtered water. Make sure to add about a tablespoon of apple cider vinegar to extract minerals, collagen and gelatin from bones! You can either stop there, or add seasonings, like we most often do. We just add whatever we have on-hand. Sometimes we have herbs, sometimes we don’t. Usually every batch has salt, whole pepper corns and garlic, onion and chili powder. You’ll notice those are our go-to seasonings!
three chicken Meals
bone-in wings with homemade potato fries and bbq sauce
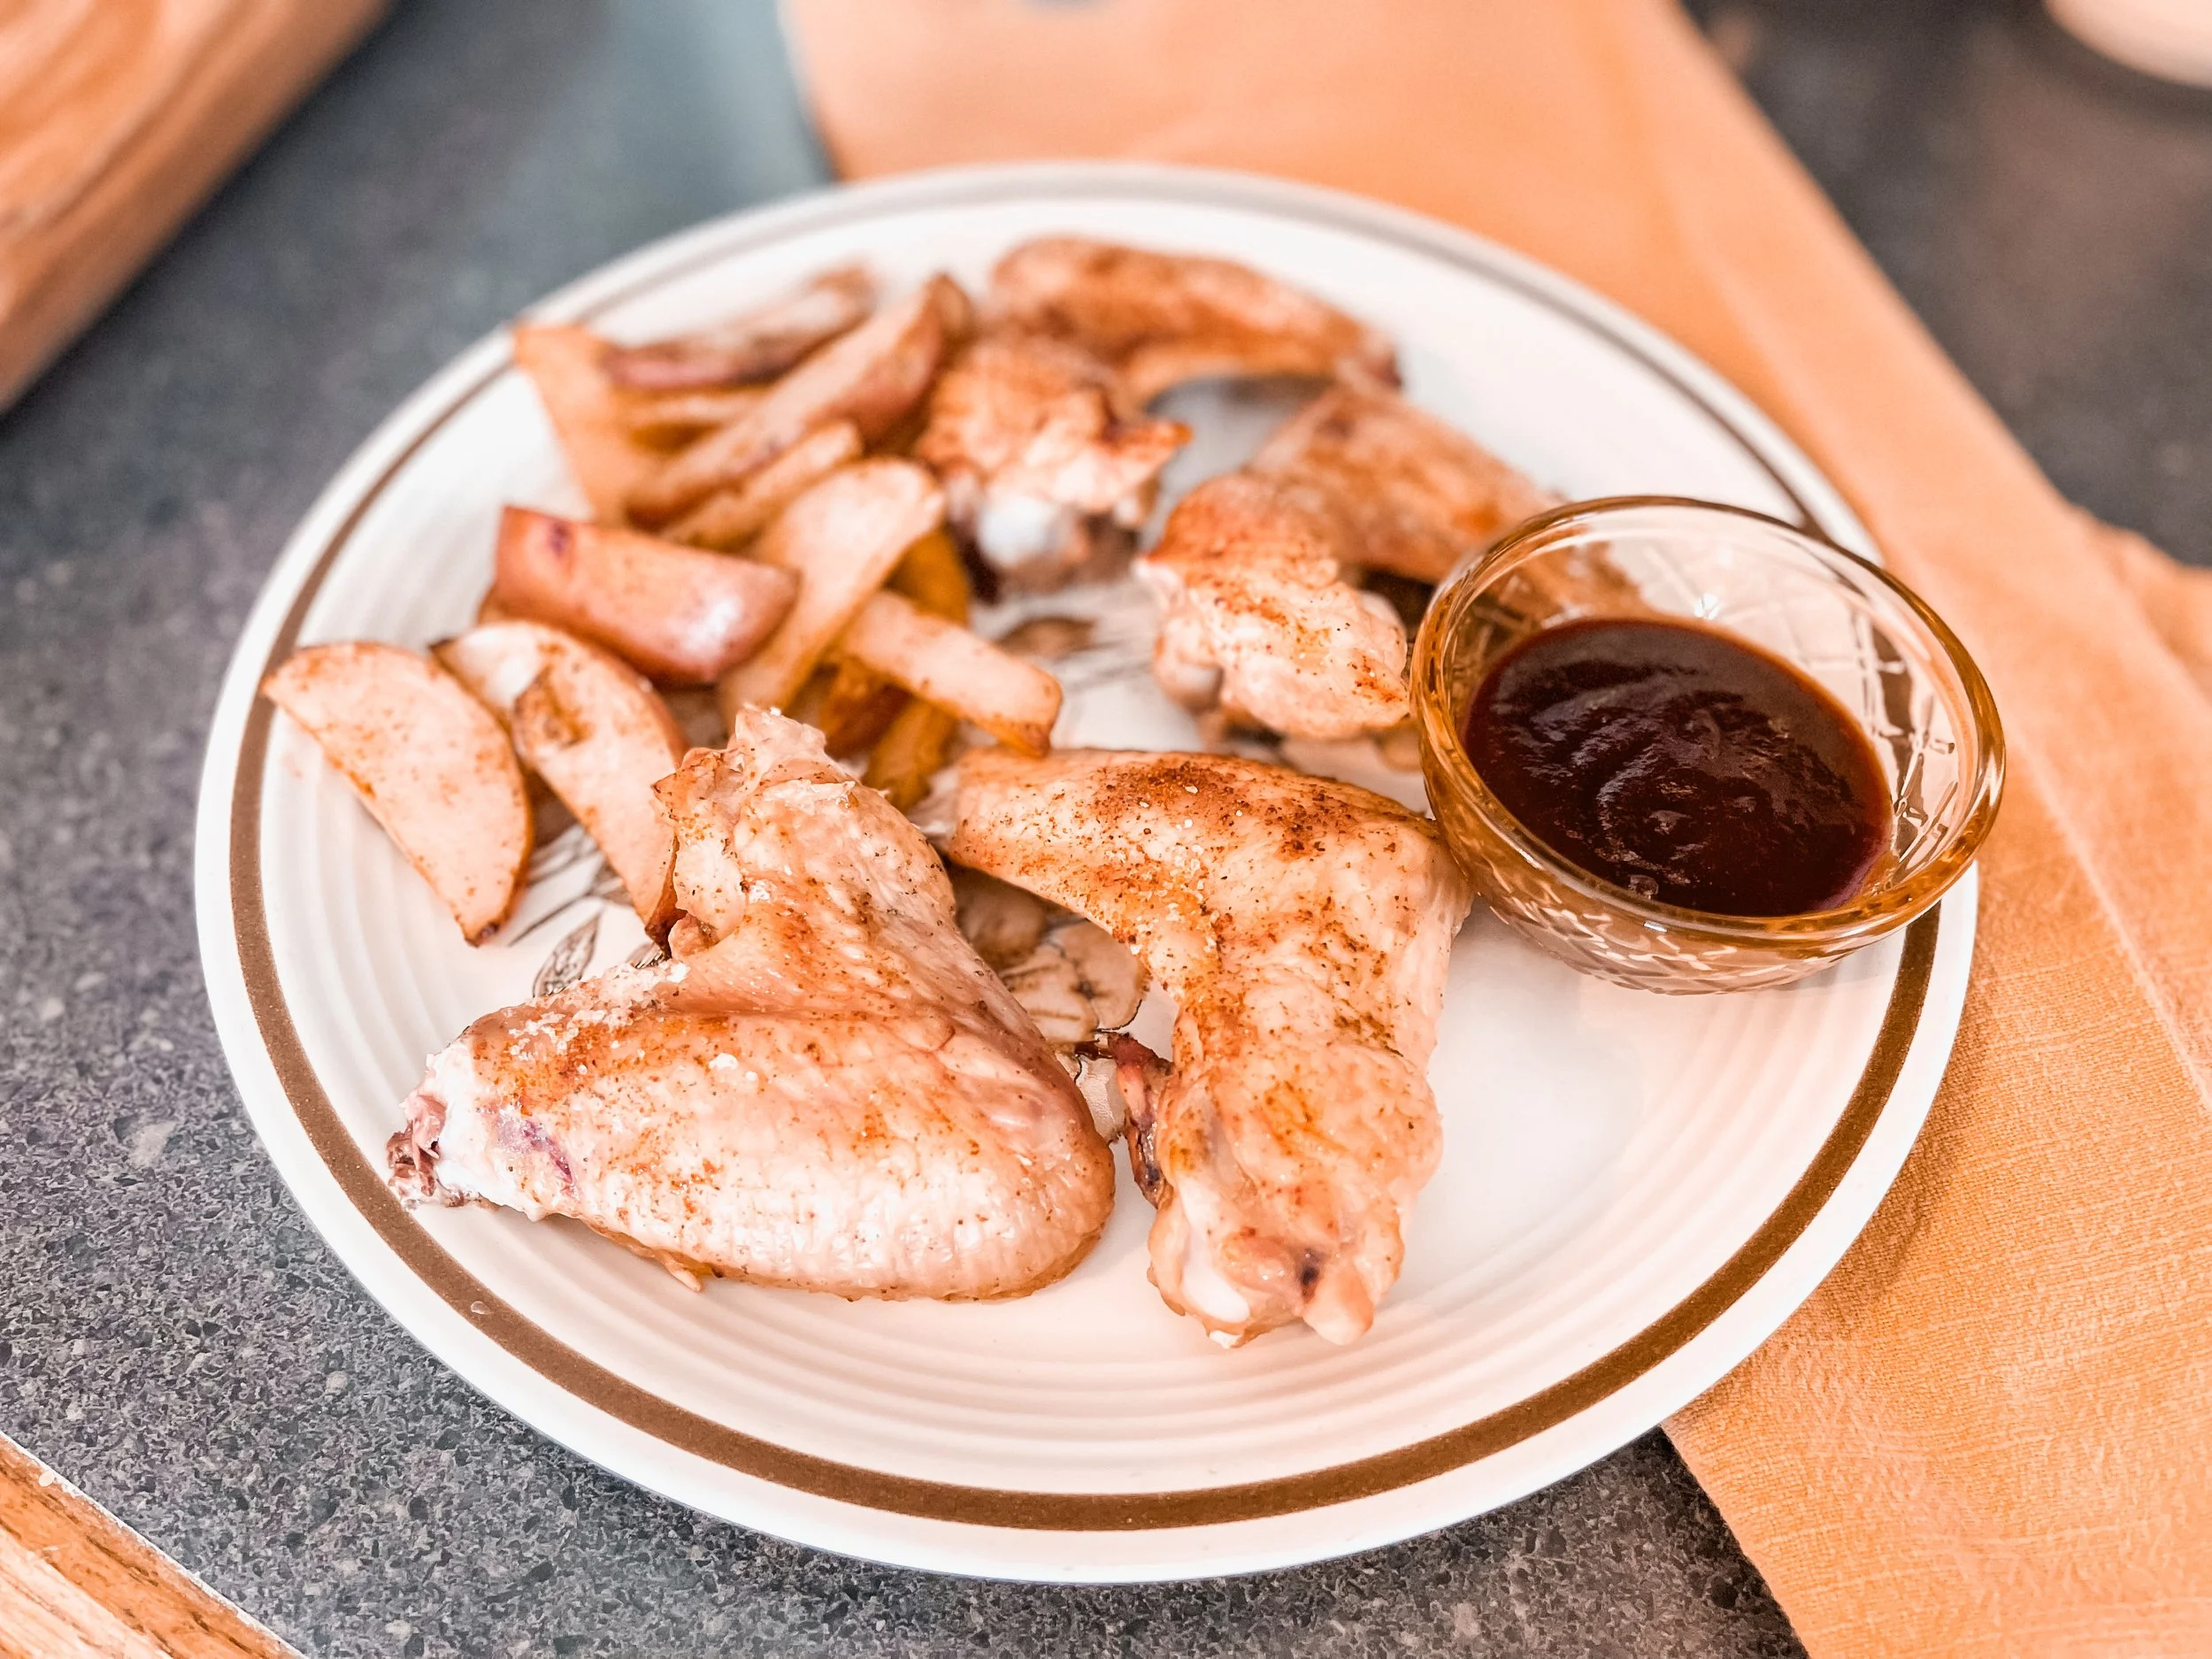
When I first got married, I had my husband cook all of our chicken, because I was afraid of not cooking it through all the way. He also would make it on the stovetop, which I had never often seen growing up, so it just always felt intimidating to me. I had to have him teach me how to cook it, how much seasoning to put and when to know it was done. He literally told me that I could smell when it was done- I certainly could not! What does a done chicken smell like?! I have since learned that food and desserts absolutely do smell done. It’s simply something we learn as we improve in our homemaking. This, though, is where the meat thermometer was and still is my helper in cooking chicken!!! My husband thinks I’m funny because I still use it every single time I make chicken, even if I can blatantly see that the skin is actually burning. First, to thaw my meat, if it’s not already in the fridge from the previous day(s), I’m literally taking it out of freezer, putting it in a large bowl and giving it a bath in the hottest water I can get out of our kitchen sink. I feel like I’ve heard that’s not the right way to do it, but I’ve personally never noticed a reason not to. My husband calls this step me washing the chicken and cooking it. I have no problem with that, because my goal is to eventually cook it, so if that happens partially while it’s in boiling water, fine by me! *Watch me get a ton of comments on why I shouldn’t be doing this. I’m waiting. Haha* Once the chicken is thawed, I put it all on an oven pan- I don’t enjoy cooking chicken on the stove-top, as I prefer the taste of it more when it’s cooked in the oven, plus, then I can walk away and not feel like I have to stay put and watch it or else my home may catch on fire. But if you prefer the stovetop, don’t let me stray you away from that or scare you! I put my seasonings on, some good chunks of butter, and shove it in the oven, usually anywhere from 350-475*F depending on how quickly lunch or dinner is approaching. If I have enough room in the oven on one rack, I will wait to put the chicken in just yet. I’ll cut my potatoes into potato fry slices, put them in a pan, and same thing as the chicken, add the seasonings and butter. I like to flip the potato fries once they’ve cooked for a bit, just so that they don’t stick to the bottom of the pan and fall apart when I get them out to serve. I use my meat thermometer and wait until the internal chicken temperature is 165*F or higher- I often times have it go far past that, and sometimes we actually prefer it because we find that the chicken falls off of the bones easily. Play around with what you and your family enjoy, and don’t be afraid to try different things! Add some of our homemade barbecue sauce and/or ketchup or our homemade sour cream dip! We often times make some frozen broccoli with salt, pepper and butter- however, we did not have anymore at the filming of this video.
bone-in chicken with homemade creamy mashed potatoes and vegetables
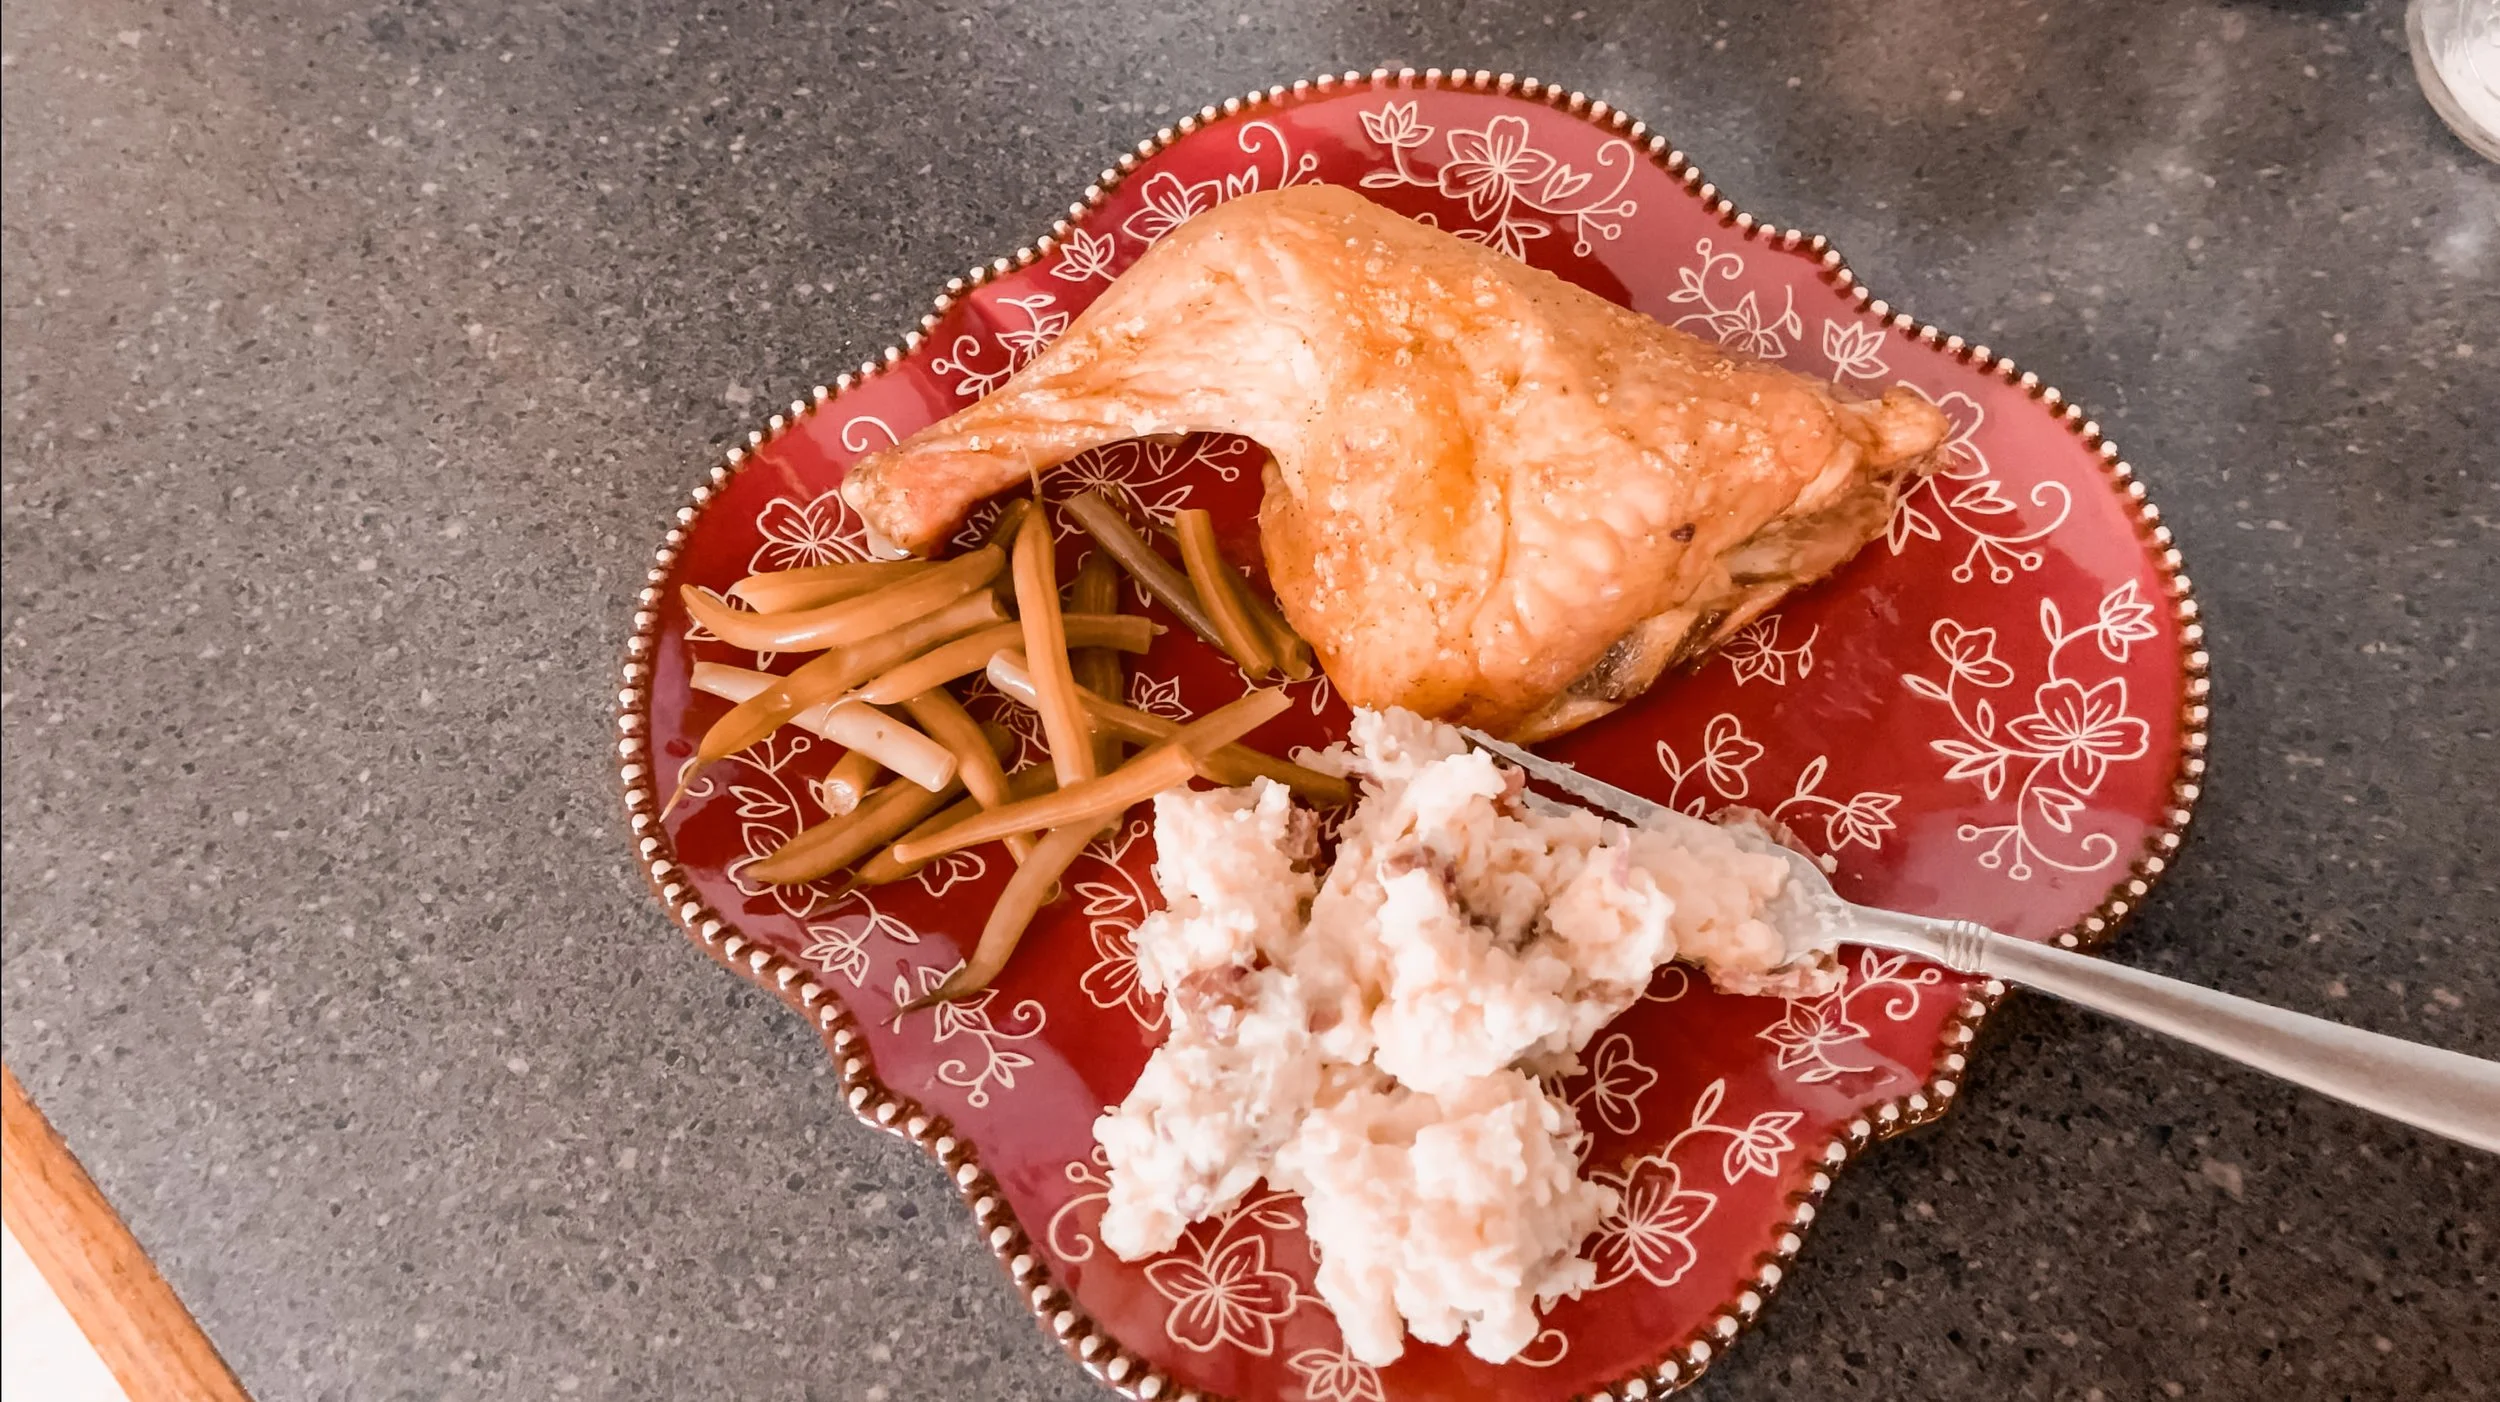
Same as above with the chicken, cook this chicken the same way. As for the mashed potatoes, cut up your potatoes- they don’t need to be in super small pieces, because we will end up using a potato masher at the end. Put the potato slices in a pot, with some of our homemade bone broth, or simply some filtered water, and bring to a boil- let boil until potatoes are soft. Keep adding bone broth or water if your pot runs out of liquid and potatoes are not quite done- you can always strain out more liquid once they do get soft. Then, get some anger out with the masher and mash mash mash! Once smooshed to your liking, add some dairy- we usually add raw milk, sour cream and butter, and mix all together for creamy mashed potatoes! Here, we added some friend’s fermented green beans. Often times, the main vegetables we have on hand are fresh potatoes and frozen broccoli, peas and green beans. Choose what you enjoy!
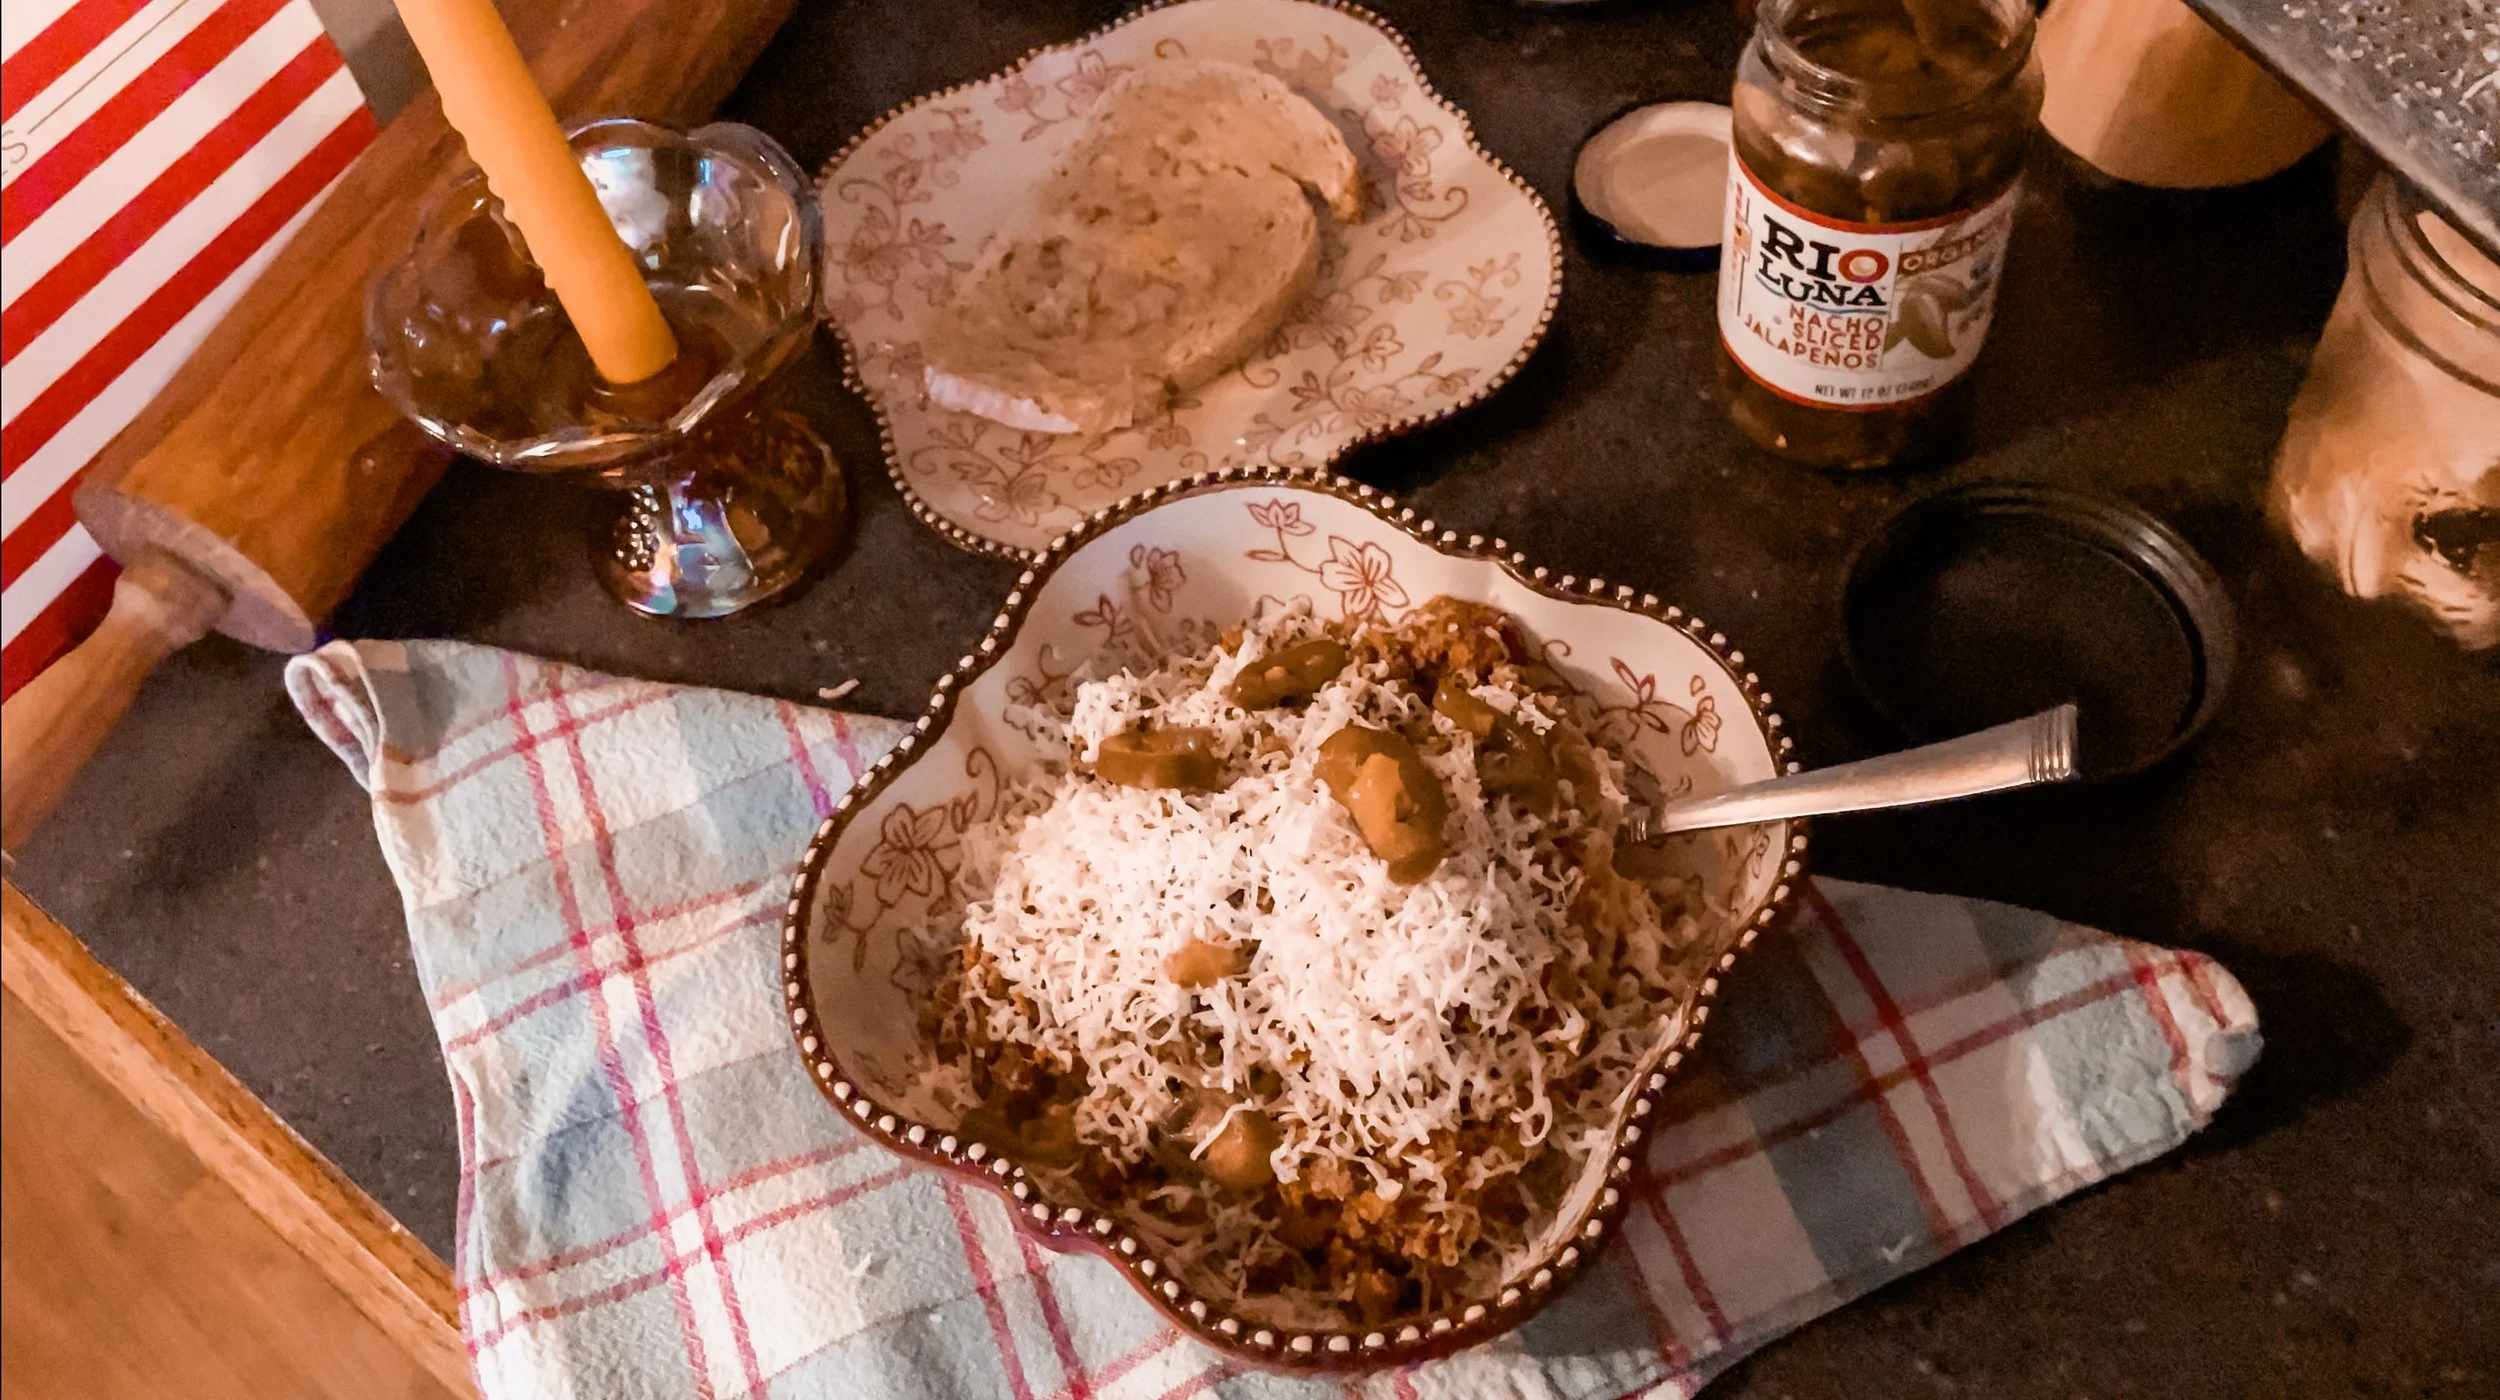
chicken taco bowl
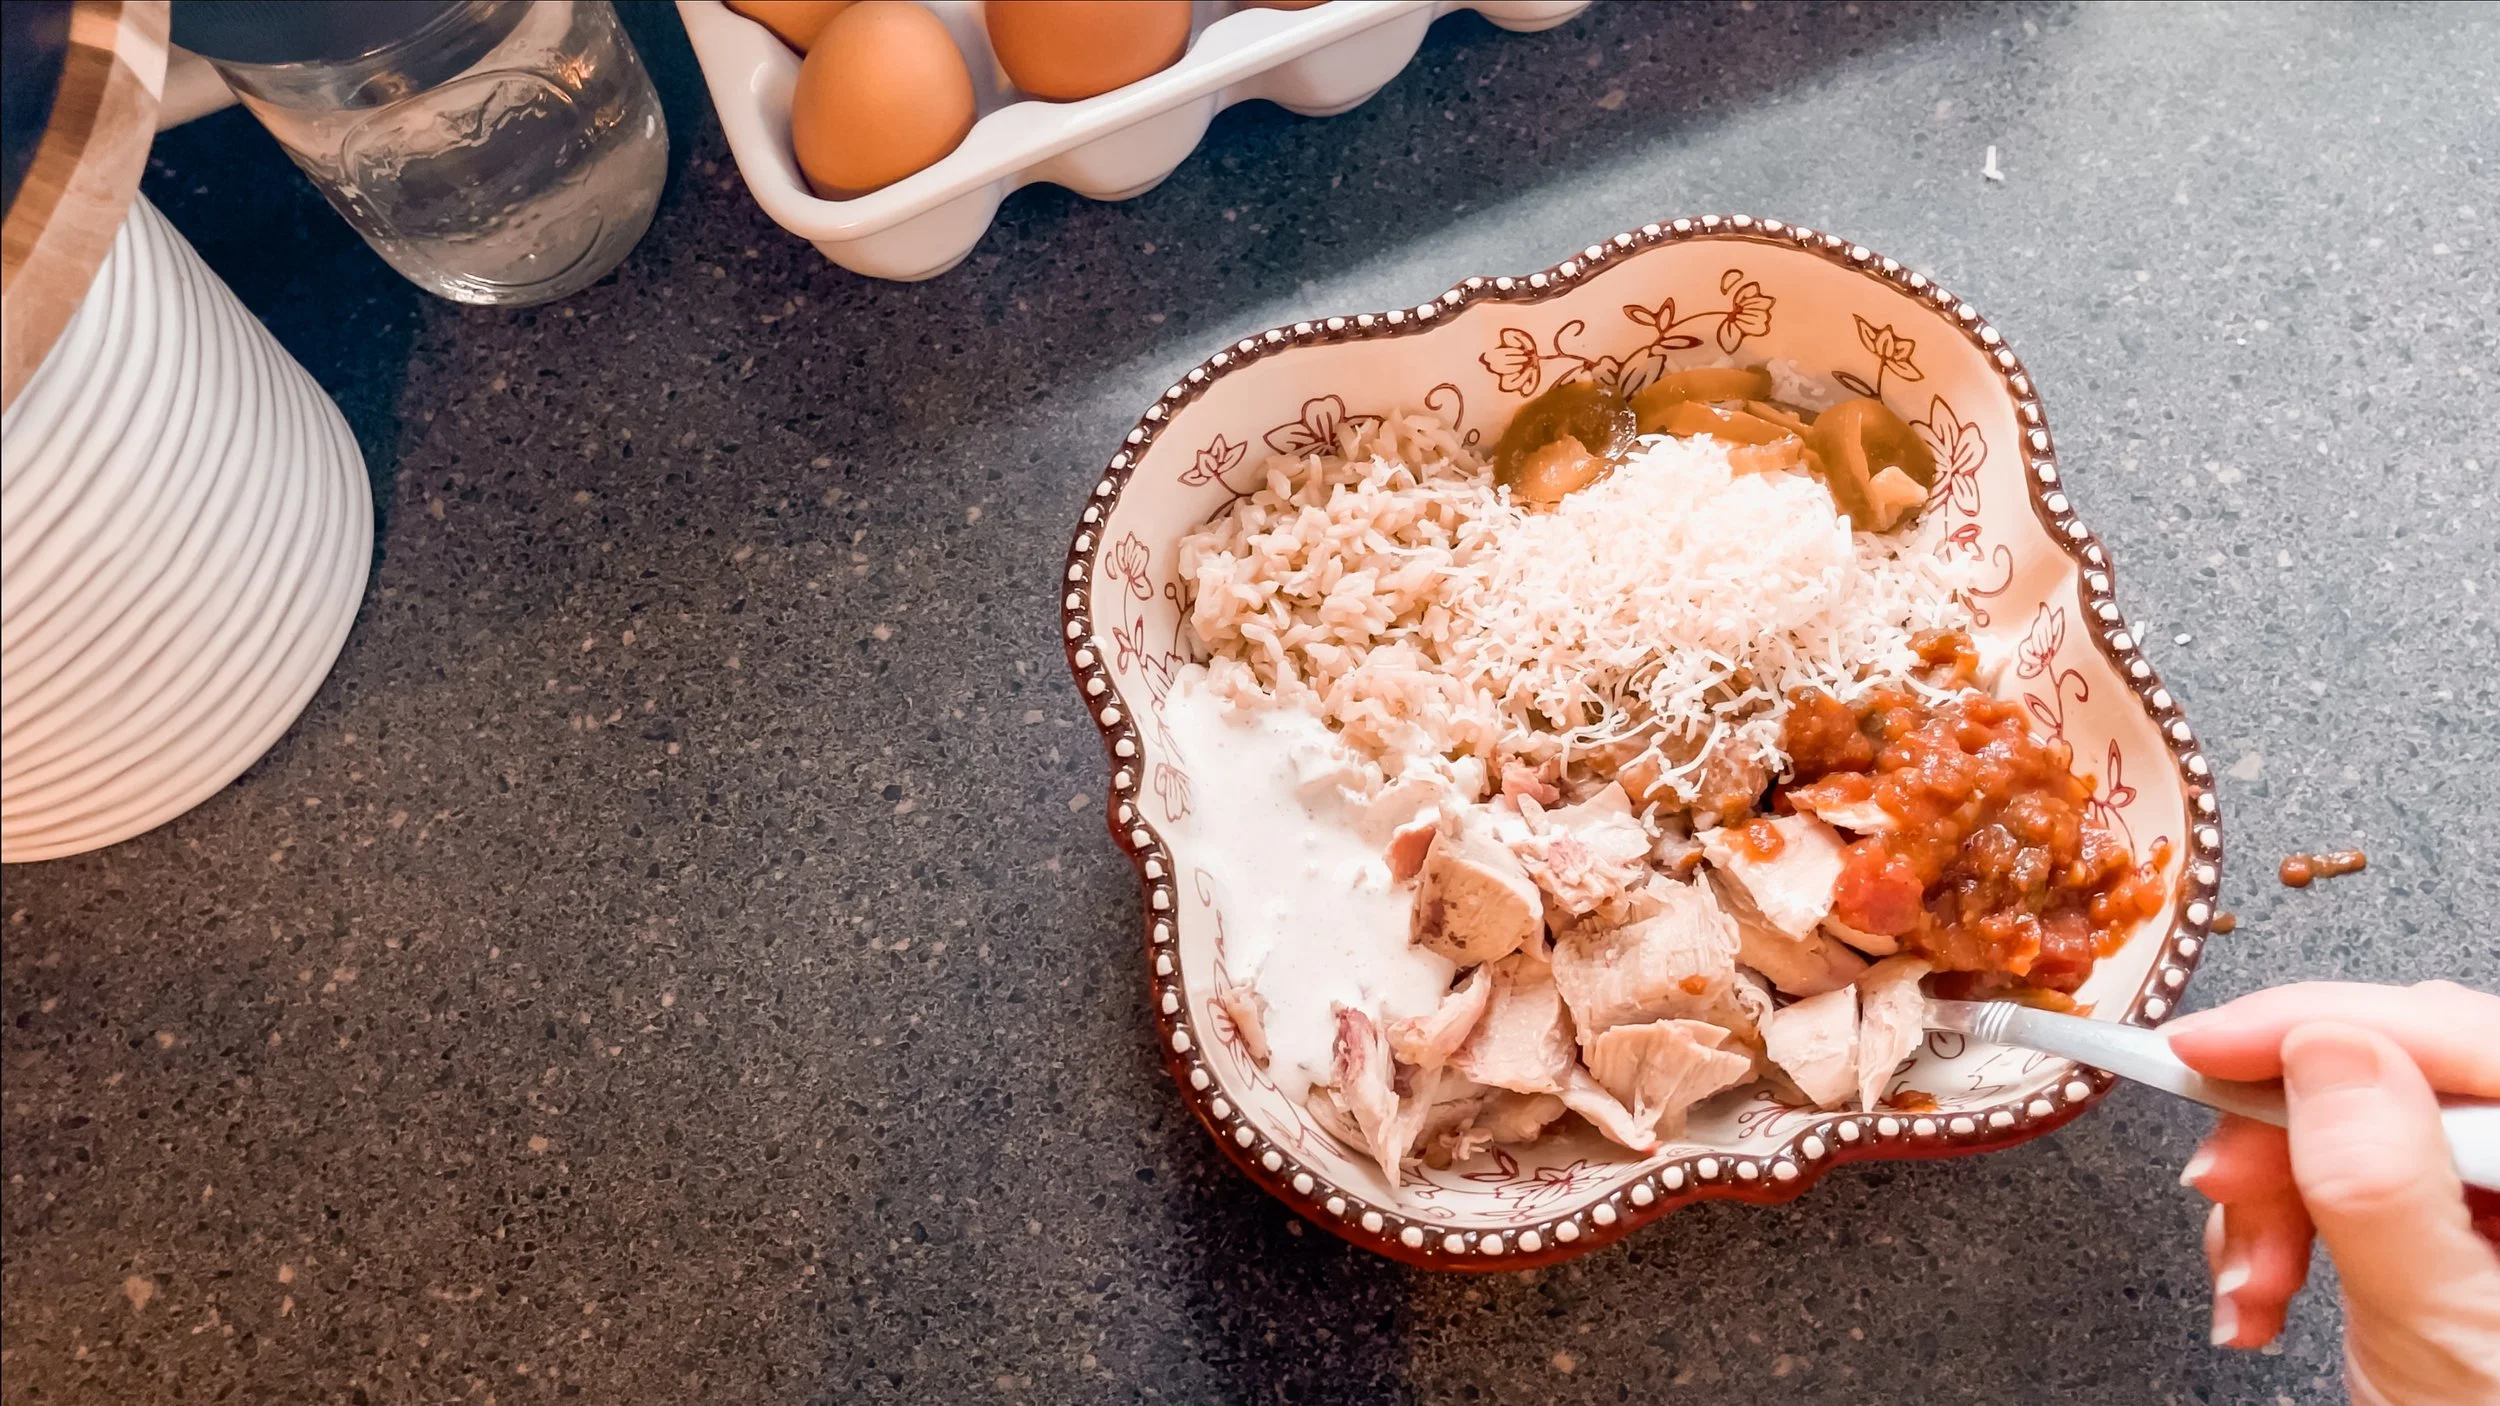
Once again, cook chicken the same as above, except, also add cumin to your seasonings, as this is the seasoning that makes tacos’ flavors burst! We make taco bowls two different ways, regarding the rice and beans. We either put black beans and rice- either white or brown, together and cook in some of our homemade canned bone broth, or we make our rice separate and make pinto beans and smash once they’re soft to make refried beans. Choose your liking! In this video, I am cooking brown rice by itself in our homemade bone broth- brown rice takes much longer than white rice, about an hour, until the grains get soft. I am putting pinto beans into a pot with our homemade bone broth and some salt and pepper, and cooking until soft, then mashing until desired consistency. To finish off our taco bowls, we really enjoy our homemade sour cream dip, jalapenos, freshly grated cheese and some salsa- you put whatever you want on yours! We always add some raw milk to drink on the side when we have spicy meals.
Ground beef meal
einkorn spaghetti with fun toppings and garlic salt sourdough bread
First, let’s start with our noodles. We use einkorn noodles, as it’s one of the earliest ancient grains, and very easily digestible. We put our noodles in a large pot, and dump in some of our homemade bone broth, or filtered water if you don’t have broth. Watch this, and add more liquid if you need to. You can always strain at the end if your noodles are done but you still have more liquid. Cook those until preferred texture- we call ours “soggy noodles.” Haha. Our family eats ancestral ground beef, which is ground beef that has ground liver and heart mixed in it, for added nutrients. I know it sounds gross if you’re not used to it, but you don’t taste it! And if you do, learn to love it. Once our family knows something is beneficial for our health, we learn to love it- and you can, too! Either way, cook your ground beef with some butter and the same seasonings we’ve used this whole video, with also adding basil and oregano- the flavors for spaghetti that really burst with deliciousness! Cook until it’s not red anymore. Once browned, add whatever pasta sauce you enjoy, and let simmer- this is the best way to have spaghetti. All of the flavors just come together so beautifully. As toppings, we love some freshly grated cheese and jalepenos! For the side, always always gotta have a slice of local sourdough with some butter, salt and garlic powder on it, and shove in the oven for a few minutes. Once again, with a spicy meal, we’ve got a glass of raw milk. Plus, the fat in the milk helps us digest our protein and carb!
I really hope you learned something from being here today! Let me know if you try any of these simple meals! If you have any simple meals to share with our home and new homemakers, please don’t forget to let us know in the comments below! Your encouraging engagement in the comments strengthens me in my walk with God as He leads me in encouraging you to create a fruitful home. It also blesses those who may be craving sisterhood community and encouragement in homemaking. I would love for this to be a safe place filled with righteous conversation. If you enjoy content like this, please consider subscribing and liking so that you don’t miss my videos every Friday mornin’! Bye, friend!